
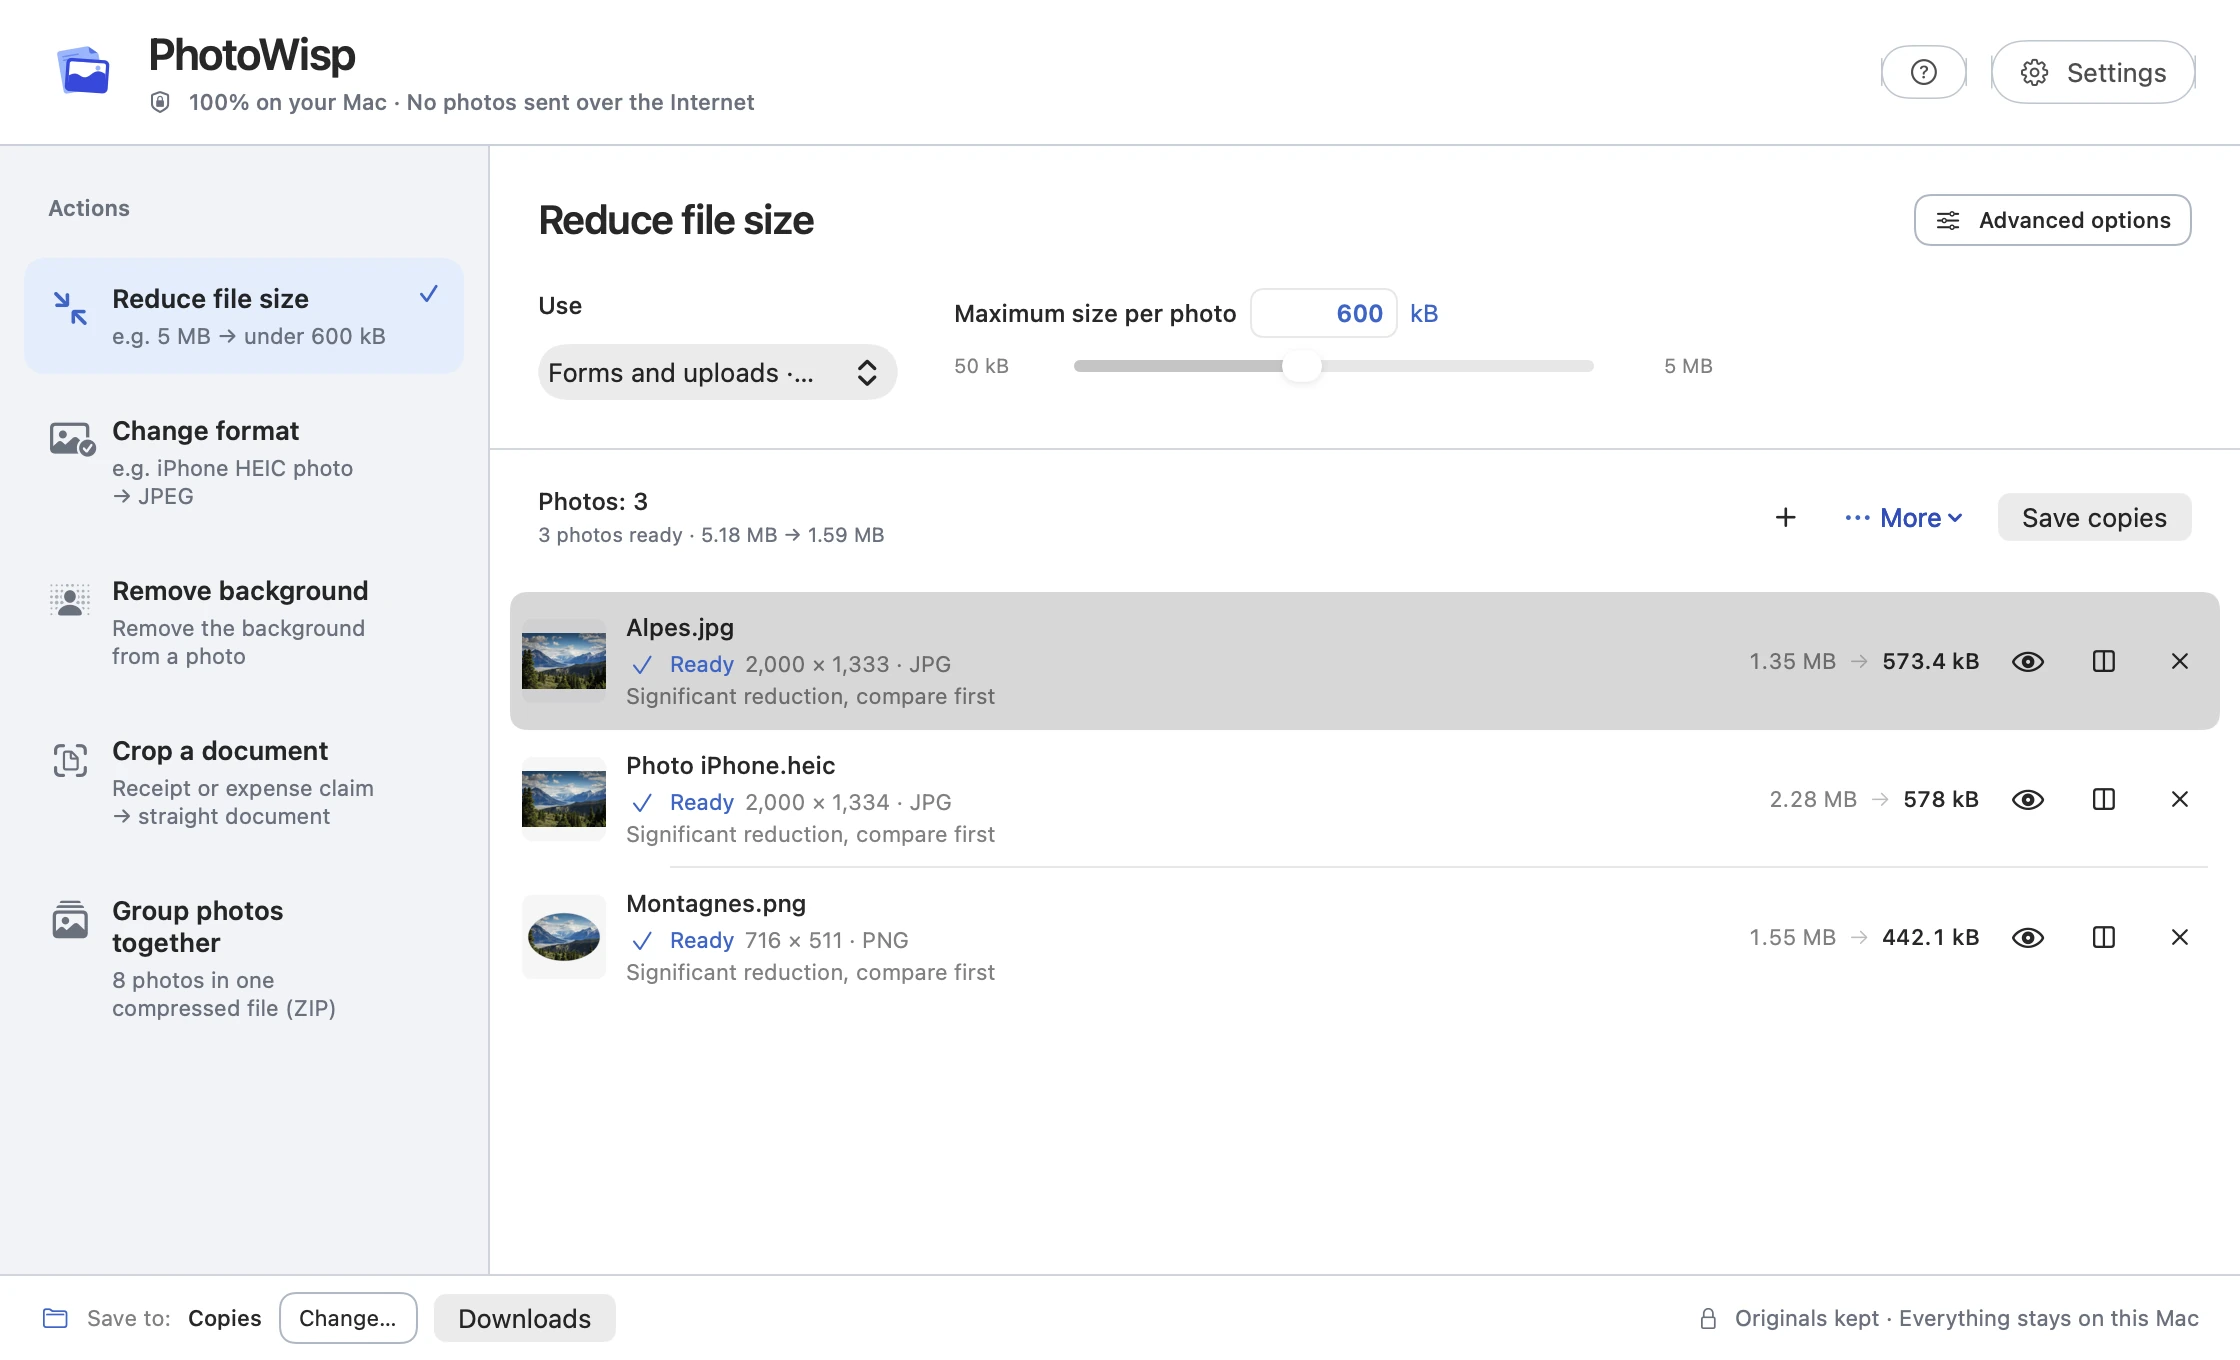
Read the form’s requirements
Look beside the upload field for accepted extensions, maximum size per file, pixel dimensions and required content. Examples such as 600 kB or 1 MB are illustrative only; each service sets its own rules. A technically valid image may still be rejected if it does not show the document or subject requested.
Do not judge file size by how large a photo looks on screen. A tiny thumbnail may represent a large source image. Equally, aggressive reduction can make the reference numbers on a photographed supporting document difficult to read.
Make a suitable copy
PhotoWisp accepts JPEG, PNG and HEIC. Its initial reduction target is 600 kB per photo and can be adjusted. In a batch, that target applies to each image individually rather than to the total size.
- Add the photo and choose Reduce file size with the limit stated by the service.
- If HEIC is rejected, use Change format to create a JPEG and also check its file size.
- Optionally set a longest-edge limit in Advanced options. Small photos are never enlarged.
- Run preparation and inspect Preview, Compare, dimensions and the actual byte count.
- Save the copy and select this new file in the online form.
Check the important information
Inspect useful content at 100%: text, a face or any details requested by the recipient. Compression can remove information. If the copy is unreadable, raise the target within the allowed limit or take a better source photo. For paper photographed at an angle, document cropping may help before this final check.
Processing stays on your Mac and leaves the originals intact. Uploading to the form is a separate step. Read its confirmation or error message afterward: PhotoWisp measures the produced file, but cannot guarantee that another service will accept it. Keep the original until you know the submission has succeeded.
Common questions
Why is my photo rejected even below the size limit?
The form may also require a particular format, pixel dimensions or content. Read its instructions and error message.